In this blog we will cover step by step process to install and configure Microsoft Deployment Toolkit for Windows 7 Deployment.
Pre-requisite:-
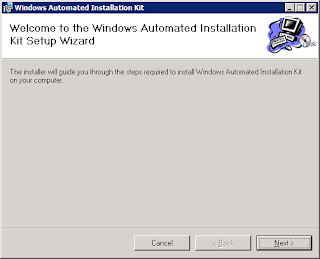
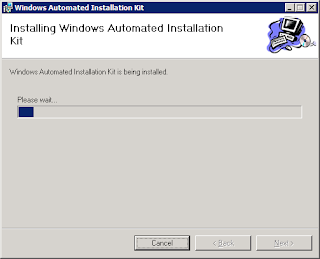
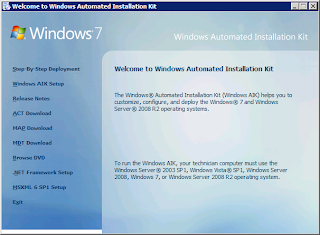
Windows Automated Installation Kit (WAIK) Installation Procedure
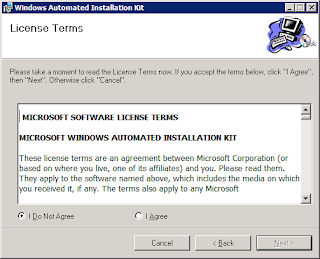
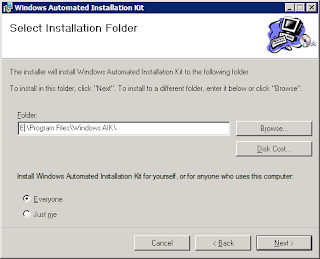
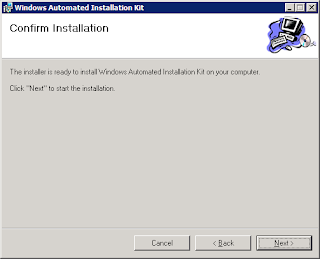
Once the above mentioned components are installed, select “Windows AIK Setup” and follow the screenshots below to complete the WAIK Tool Kit Installation.
Change the installation path to the drive where you have enough space
Click Close and finish the installation.

Microsoft Deployment Tool kit 2010 (MDT 2010) Update 1 Installation
The next step is to install and configure MDT 2010 Update 1. Follow the steps below for installing and configuring MDT 2010.
Download the latest version of Microsoft Deployment Toolkit 2010 Accelerator and start the installation by double clicking the MSI file.


Change the installation locations to the Drive where you have enough Space.


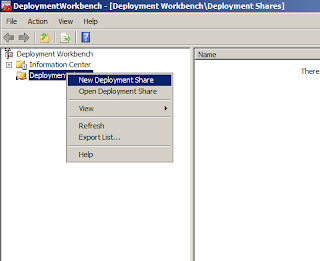
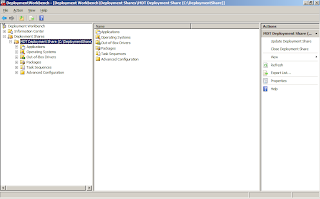
Open Microsoft Deployment Workbench and Navigate to “Deployment Shares”.
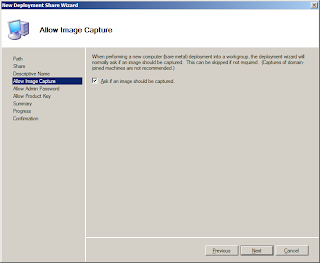
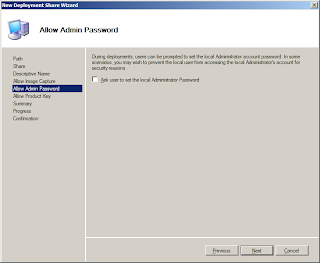
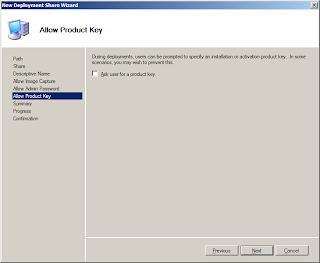
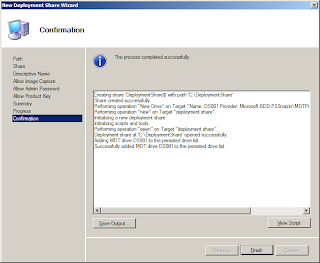
Right Click and select New Deployment Share
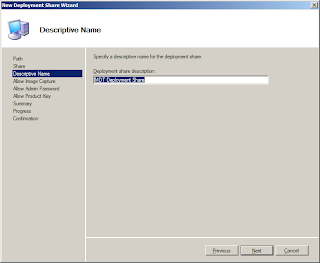
Specify the path for New Deployment Share.
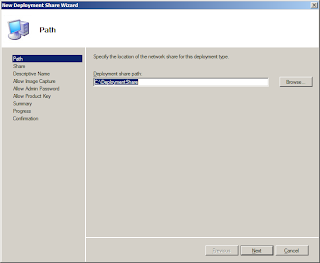
Leave rest of the settings default.


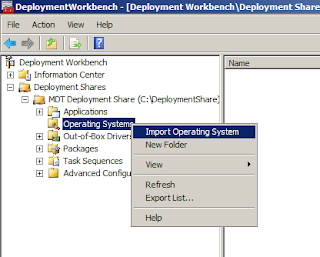
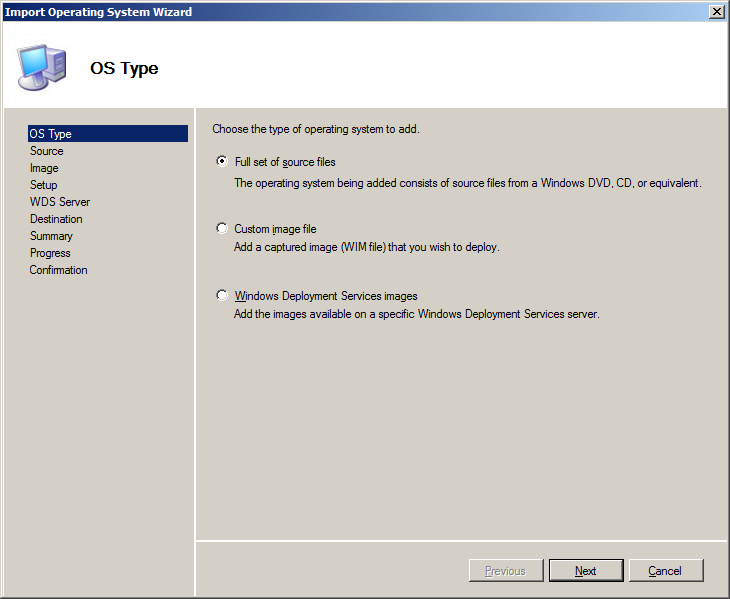
Import operating Systems – Windows 7 Source files
Open the WorkbenchàDeployment SharesàMDT Deployment Shareàoperating systemsàRight ClickàImport operating System
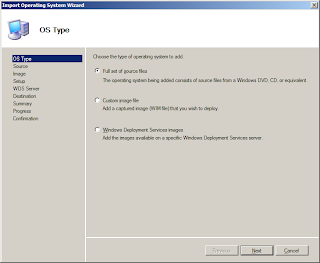
Select the Full set of source files.
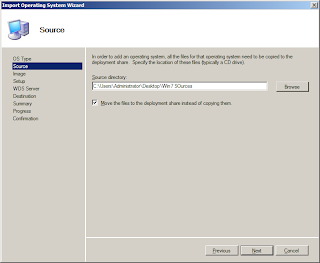
Locate the full path where source files are located.
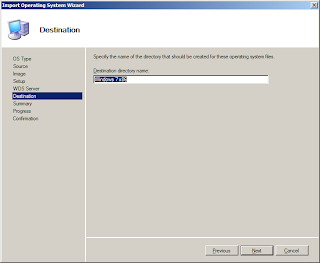
Select the Destination Folder to be created in Deployment Share.
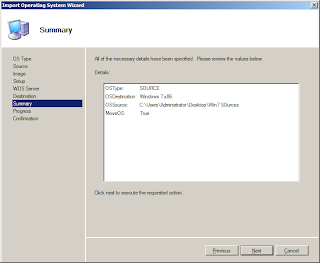
Provide the path of Driver folder.
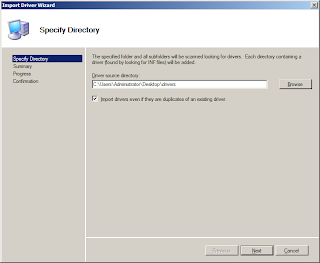
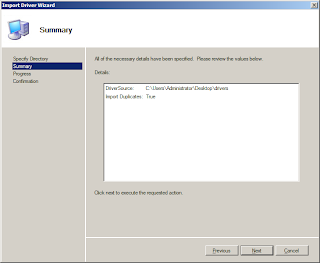
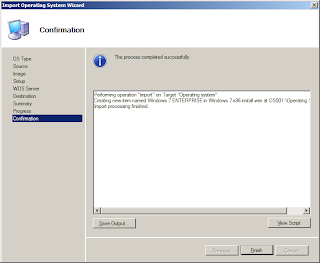
Click Finish.
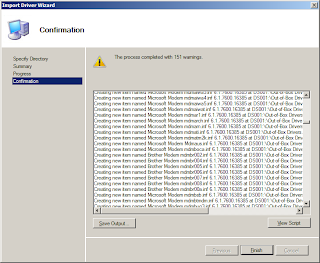
Drivers will be successfully imported.
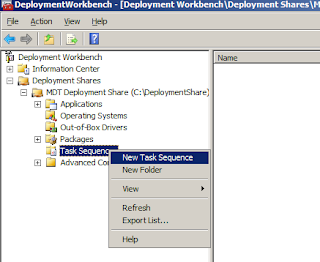
Creating Task Sequence
Now that we have completed importing operating systems now it’s time to create a Task Sequence to tie all of these components together to carry out a successful deployment. We shall create a Task Sequence now to tie the operating system, unattended answer file, settings and the task sequencer together. Task Sequencer is an XML file which defines various steps involved in an OS deployment.
Open Microsoft Deployment Workbench and navigate to “Deployment Shares” -> “Task Sequences”
Right click on “Task Sequences” and select “New”
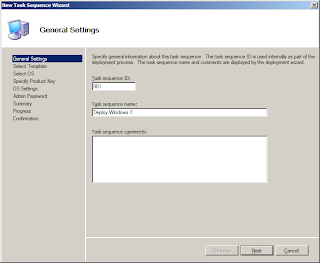
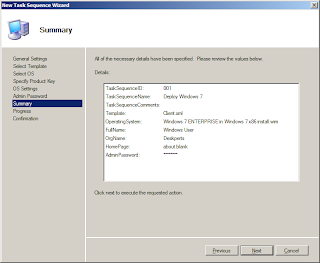
Enter the following parameters and click Next
Task Sequences ID = “001”
Task Sequences Name = “Deploy Windows 7”
Task Sequences Comments =
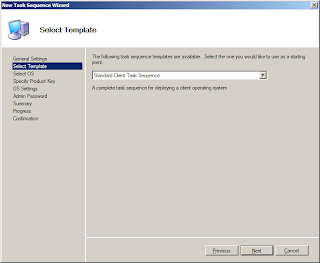
Select the template from the built-in templates. For Client Installations you can select “Standard Client Task Sequence”
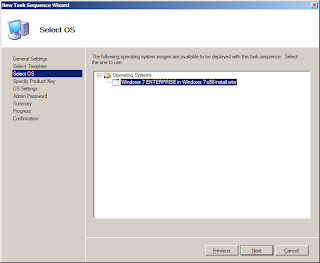
Select the Windows 7 Enterprise and click Next.
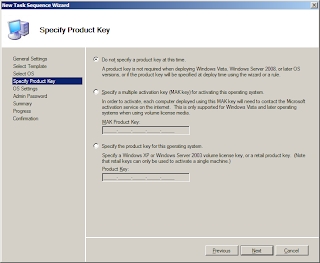
In the next screen Specify Product Key select “Do not specify product key at this time” for KMS Key integration scenario and click Next continue. For MAK specify the key.
Provide home page details that needs to be configured on all desktops provisioned with the new OS.

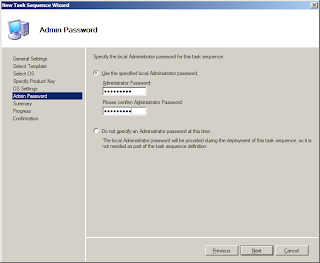
Select the option “Use the specified Local Administrator password”. & give the administrator password & click next to continue.
Click Next to continue.
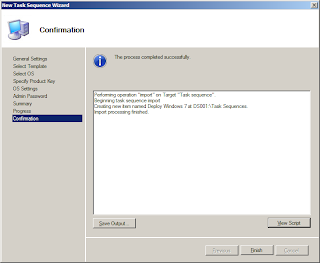
Click Finish.
Task Sequence Customization Procedure
Customizing and Updating Deployment Share
Right click on Deployment Share and click Properties
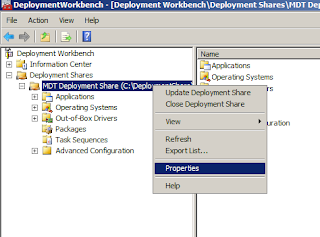
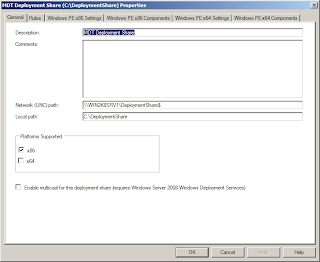
On General, Deselect x64 check box and click Rules tab
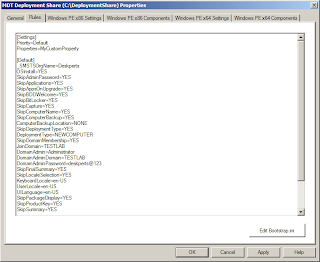
On Rules tab, specify below settings to automate deployment process and click OK.
Custom Settings
MDT: Custom Settings for Refesh Deployment
MDT: Custom Settings for New Computer Deployment
Bootstrap Settings
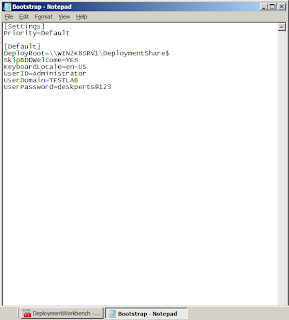
MDT: BootStrap Settings for Deployment
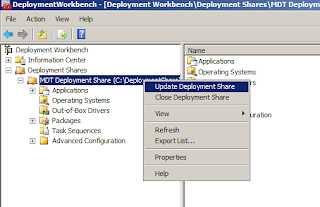
Now again right click Deployment Share and click “Update Deployment Share”.
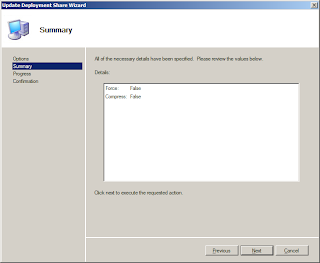
Click Next.
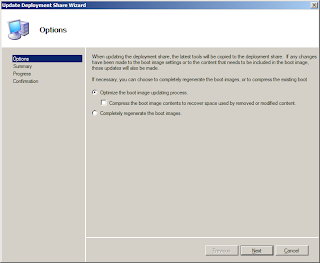
Click Next.
 How to get the boot
Image:
How to get the boot
Image:
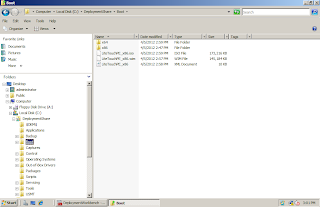
1. Copy the LiteTouchPE_x86.iso file from the installation Directory boot images location and Burn it into a Bootable CD.
or
2. From Windows XP machine access Litetouch.vbs script from deployment share. (Covered in part 2)
Pre-requisite:-
Windows Automated Installation Kit (WAIK) Installation Procedure
Please note that
installing WAIK for Win7 on Windows Server 2008 doesn’t need these
pre-requisites to be installed.
Launch Startcd.exe utility and install MSXML6.0 and .NET Framework 2.0 if you have not already installed via Windows Update or any other means.
Launch Startcd.exe utility and install MSXML6.0 and .NET Framework 2.0 if you have not already installed via Windows Update or any other means.

Once the above mentioned components are installed, select “Windows AIK Setup” and follow the screenshots below to complete the WAIK Tool Kit Installation.


Change the installation path to the drive where you have enough space


Click Close and finish the installation.

Microsoft Deployment Tool kit 2010 (MDT 2010) Update 1 Installation
The next step is to install and configure MDT 2010 Update 1. Follow the steps below for installing and configuring MDT 2010.
Download the latest version of Microsoft Deployment Toolkit 2010 Accelerator and start the installation by double clicking the MSI file.
Follow the screenshots below and complete the MICROSOFT DEPLOYMENT
TOOLKIT Workbench installation.


Change the installation locations to the Drive where you have enough Space.


Click Finish to complete the installation.
Now the MDT Server has been installed successfully.
Procedure to create MDT Deployment share
Go to Start Menu -> All Programs -> Microsoft Deployment Toolkit -> Click Deployment Workbench.

Open Microsoft Deployment Workbench and Navigate to “Deployment Shares”.
Right Click and select New Deployment Share

Specify the path for New Deployment Share.

Leave rest of the settings default.


Import operating Systems – Windows 7 Source files
Open the WorkbenchàDeployment SharesàMDT Deployment Shareàoperating systemsàRight ClickàImport operating System

Select the Full set of source files.
Locate the full path where source files are located.

Select the Destination Folder to be created in Deployment Share.


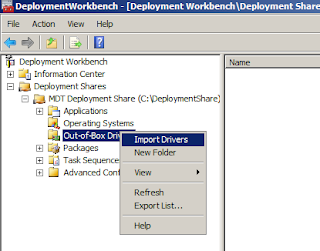
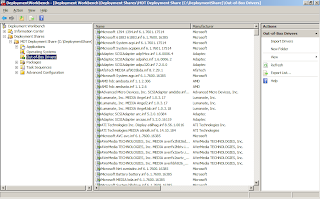
Importing Drivers.
Go to Out of Box Drivers to import the appropriate drivers. Right click and import drivers.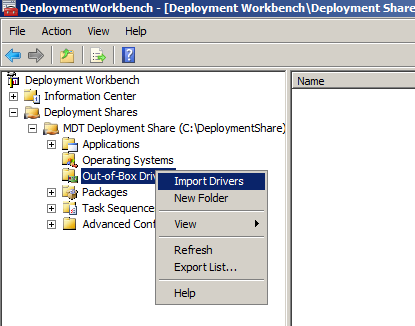
Provide the path of Driver folder.


Click Finish.

Drivers will be successfully imported.

Creating Task Sequence
Now that we have completed importing operating systems now it’s time to create a Task Sequence to tie all of these components together to carry out a successful deployment. We shall create a Task Sequence now to tie the operating system, unattended answer file, settings and the task sequencer together. Task Sequencer is an XML file which defines various steps involved in an OS deployment.
Open Microsoft Deployment Workbench and navigate to “Deployment Shares” -> “Task Sequences”
Right click on “Task Sequences” and select “New”

Enter the following parameters and click Next
Task Sequences ID = “001”
Task Sequences Name = “Deploy Windows 7”
Task Sequences Comments =

Select the template from the built-in templates. For Client Installations you can select “Standard Client Task Sequence”

Select the Windows 7 Enterprise and click Next.

In the next screen Specify Product Key select “Do not specify product key at this time” for KMS Key integration scenario and click Next continue. For MAK specify the key.

Provide home page details that needs to be configured on all desktops provisioned with the new OS.

Select the option “Use the specified Local Administrator password”. & give the administrator password & click next to continue.

Click Next to continue.

Click Finish.

Task Sequence Customization Procedure
Right click the Task Sequence created and
select Properties.
The following steps need to be
added or modified in the Task Sequence if deploying for New Computer:
Task Sequence Phase
|
Description
|
Preinstall
|
Edit the default settings in Format and Partition
Disk

Click on
OSDisk & Edit , In Use a Percentage of remaining free space, change the
value from 100 to 50 GB.

Click on New ,Provide the details as mentioned
below
 
This uses a percentage logic to create the
partitions
Ex; If the hard disk size is 80 GB ,It uses % partition
logic, which assigns 50 GB of the disk size to system drive(C:\) &
remaining 100% to Data drive
 |
Customizing and Updating Deployment Share
Right click on Deployment Share and click Properties

On General, Deselect x64 check box and click Rules tab

On Rules tab, specify below settings to automate deployment process and click OK.
Custom Settings

MDT: Custom Settings for Refesh Deployment
MDT: Custom Settings for New Computer Deployment
Bootstrap Settings

MDT: BootStrap Settings for Deployment
Now again right click Deployment Share and click “Update Deployment Share”.

Click Next.

Click Next.

Click Finish.

1. Copy the LiteTouchPE_x86.iso file from the installation Directory boot images location and Burn it into a Bootable CD.
or
2. From Windows XP machine access Litetouch.vbs script from deployment share. (Covered in part 2)

No comments:
Post a Comment