In this blog we have evaluated Microsoft Application
Virtualization 4.6 SP1 and given the detailed step by step procedure to set up
the infrastructure. The blog is divided into 3 parts:-
App-V 4.6 SP1: Management Server Installation and
Configuration
Installing App-V Management Server
Windows Domain Controller
·
Windows Server® 2008 or Windows
Server 2008 R2 with Active Directory Domain Services and Microsoft DNS
Microsoft Application Virtualization Management Server
Microsoft Application Virtualization Management Server
·
Windows Server 2008 (32-bit or
64-bit) or Windows Server 2008 R2 (64-bit)
·
IIS 7.0
·
Microsoft .NET Framework 2.0 or
higher
·
Microsoft SQL Server 2008 R2
Express Edition
o
Note: Using SQL Server 2008 R2 Express
Edition is not a supported configuration for a production environment of
Microsoft Application Virtualization. The Express Edition was chosen to
facilitate the setup of this trial environment only.
All of the
computers must be members of a common domain. You can use virtual
machines on a single physical computer that meets the system requirements of
this trial.

Install the App-V Management Server
1. Using an account with local administrator privileges, extract and run the setup executable for Microsoft Application Virtualization Management Server.
2. On the Welcome page, click Next.


4. On the Microsoft Update page, click Next.

5. On the Registering Information page, type a Name and Organization in the corresponding boxes and then click Next.

6. On the Setup Type page, choose Custom install and then click Next.


8.
On the Configuration Database page, click the Server drop-down list and then select the list entry for
this server “<servername>\SQLEXPRESS” or "local". Click Next.


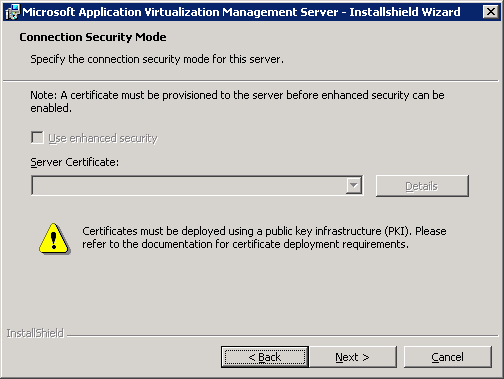
10. On the Connection Security Mode page, click Next.

12. On the Administrator Group page, type the name of the AppV Adminis group and then click Next.

13. On the Default Provider Group page, type the name of the App-V users group AppV Users, and then click Next.

14. On the Content Path page, accept the default location of the Microsoft Application Virtualization Management Server content folder by clicking Next.

15. The wizard now has all the information it needs to perform the installation. Click Install.

16. After the installation wizard completes, click No. Restart the server. Verify if the Application Virtualization Management Server service is started after the reboot.

Share the content folder
1. Open Windows Explorer.
2. Browse to C:\Program Files\Microsoft System Center App Virt Management Server\App Virt Management Server\content and share the content folder. Ensure that Read access to this folder is given to Everyone, and Full Control is given to the AppV Administrators group.
Note: If you are using a 64-bit operating system version, the folder will be under C:\Program Files (x86)\Microsoft System Center App Virt Management Server\App Virt Management Server\content.
Note: If you are using a 64-bit operating system version, the folder will be under C:\Program Files (x86)\Microsoft System Center App Virt Management Server\App Virt Management Server\content.
Publishing the Default Application
Go to the App-V Management Server:
Note: The account you are using to log on to the App-V Management Server computer must be a member of the App-V Administrators group “AppV Administrators” that you created in Active Directory.
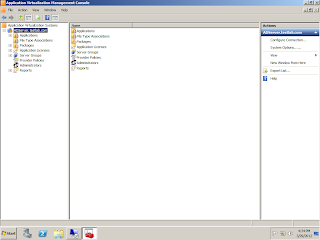
1. Click Start | Administrative Tools | Application Virtualization Management Console.
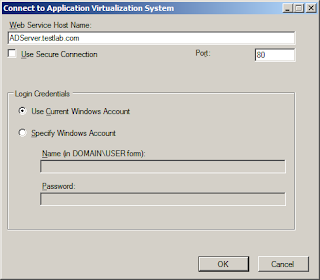
2. In the App-V Management Console, click Actions | Connect to Application Virtualization System.
3. In the Configure Connection dialog box, deselect the Use Secure Connection check box.
4. In the Web Service Host Name field, type the FQDN of your management server, and then click OK.
2. In the App-V Management Console, click Actions | Connect to Application Virtualization System.
3. In the Configure Connection dialog box, deselect the Use Secure Connection check box.
4. In the Web Service Host Name field, type the FQDN of your management server, and then click OK.

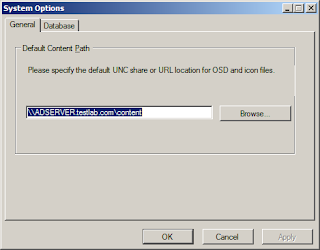
5. In the console tree, right-click the server node and click System Options….
6. On the General tab, in the Default Content Path textbox, enter the UNC path to the content share you created on the server during installation, \\<server name>\content.
Note: Use the FQDN for the server name so that the client can resolve the name correctly.
Note: Use the FQDN for the server name so that the client can resolve the name correctly.

7. Click OK.
8. In the console tree, expand the server node in the left pane, and then click Applications.
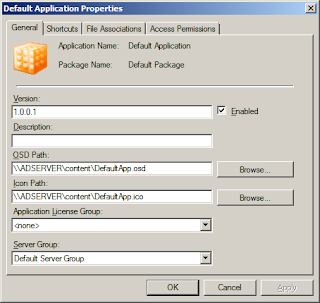
9. In the details pane, click Default Application and then, in the Actions pane, click Properties.
10. In the properties dialog, next to the OSD Path box, click Browse.
11. In the Open dialog, type \\<server name>\content and press Enter. You must use the actual server name here.
Important: Ensure that the values in both the OSD Path and Icon Path boxes are in UNC format, (for example, \\<server name>\content\DefaultApp.ico), and point to the content folder you created when installing the server. Do not use localhost or a file path containing a drive letter such as C:\Program Files\..\..\content.
12. Select the DefaultApp.osd file and click Open.
13. Perform the previous steps to configure the icon path.

14. Click the Access Permissions tab, and confirm that the App-V Users group is granted access to the application.
15. Click the Shortcuts tab, and then click Publish to User’s Desktop.
16. Click OK to accept the changes for the default application.
17. Open Windows Explorer, and go to the content directory.
18. Double-click the DefaultApp.osd file, and open it with Notepad.
19. Change the HREF to the following:
CODEBASEHREF=”RTSP://<FQDN of your server>:554/DefaultApp.sft”.


20. Close the DefaultApp.osd file and save changes.


Feel free to ask any questions..
ReplyDelete